Launch Your First Survey
Surveys are the fastest way to hear from your team. Use them for weekly pulse checks, eNPS, engagement measurement, onboarding feedback, or exit interviews. No manager reporting structure required — just pick a template, add recipients, and send.
Before you start
Section titled “Before you start”- You need the Admin role to create and launch surveys.
- Team members should be invited to your Organization before you add them as recipients.
How to launch a survey
Section titled “How to launch a survey”Step 1: Select a template
Section titled “Step 1: Select a template”- Click Surveys in the left navigation
- Click New Survey
- Choose a template from the list
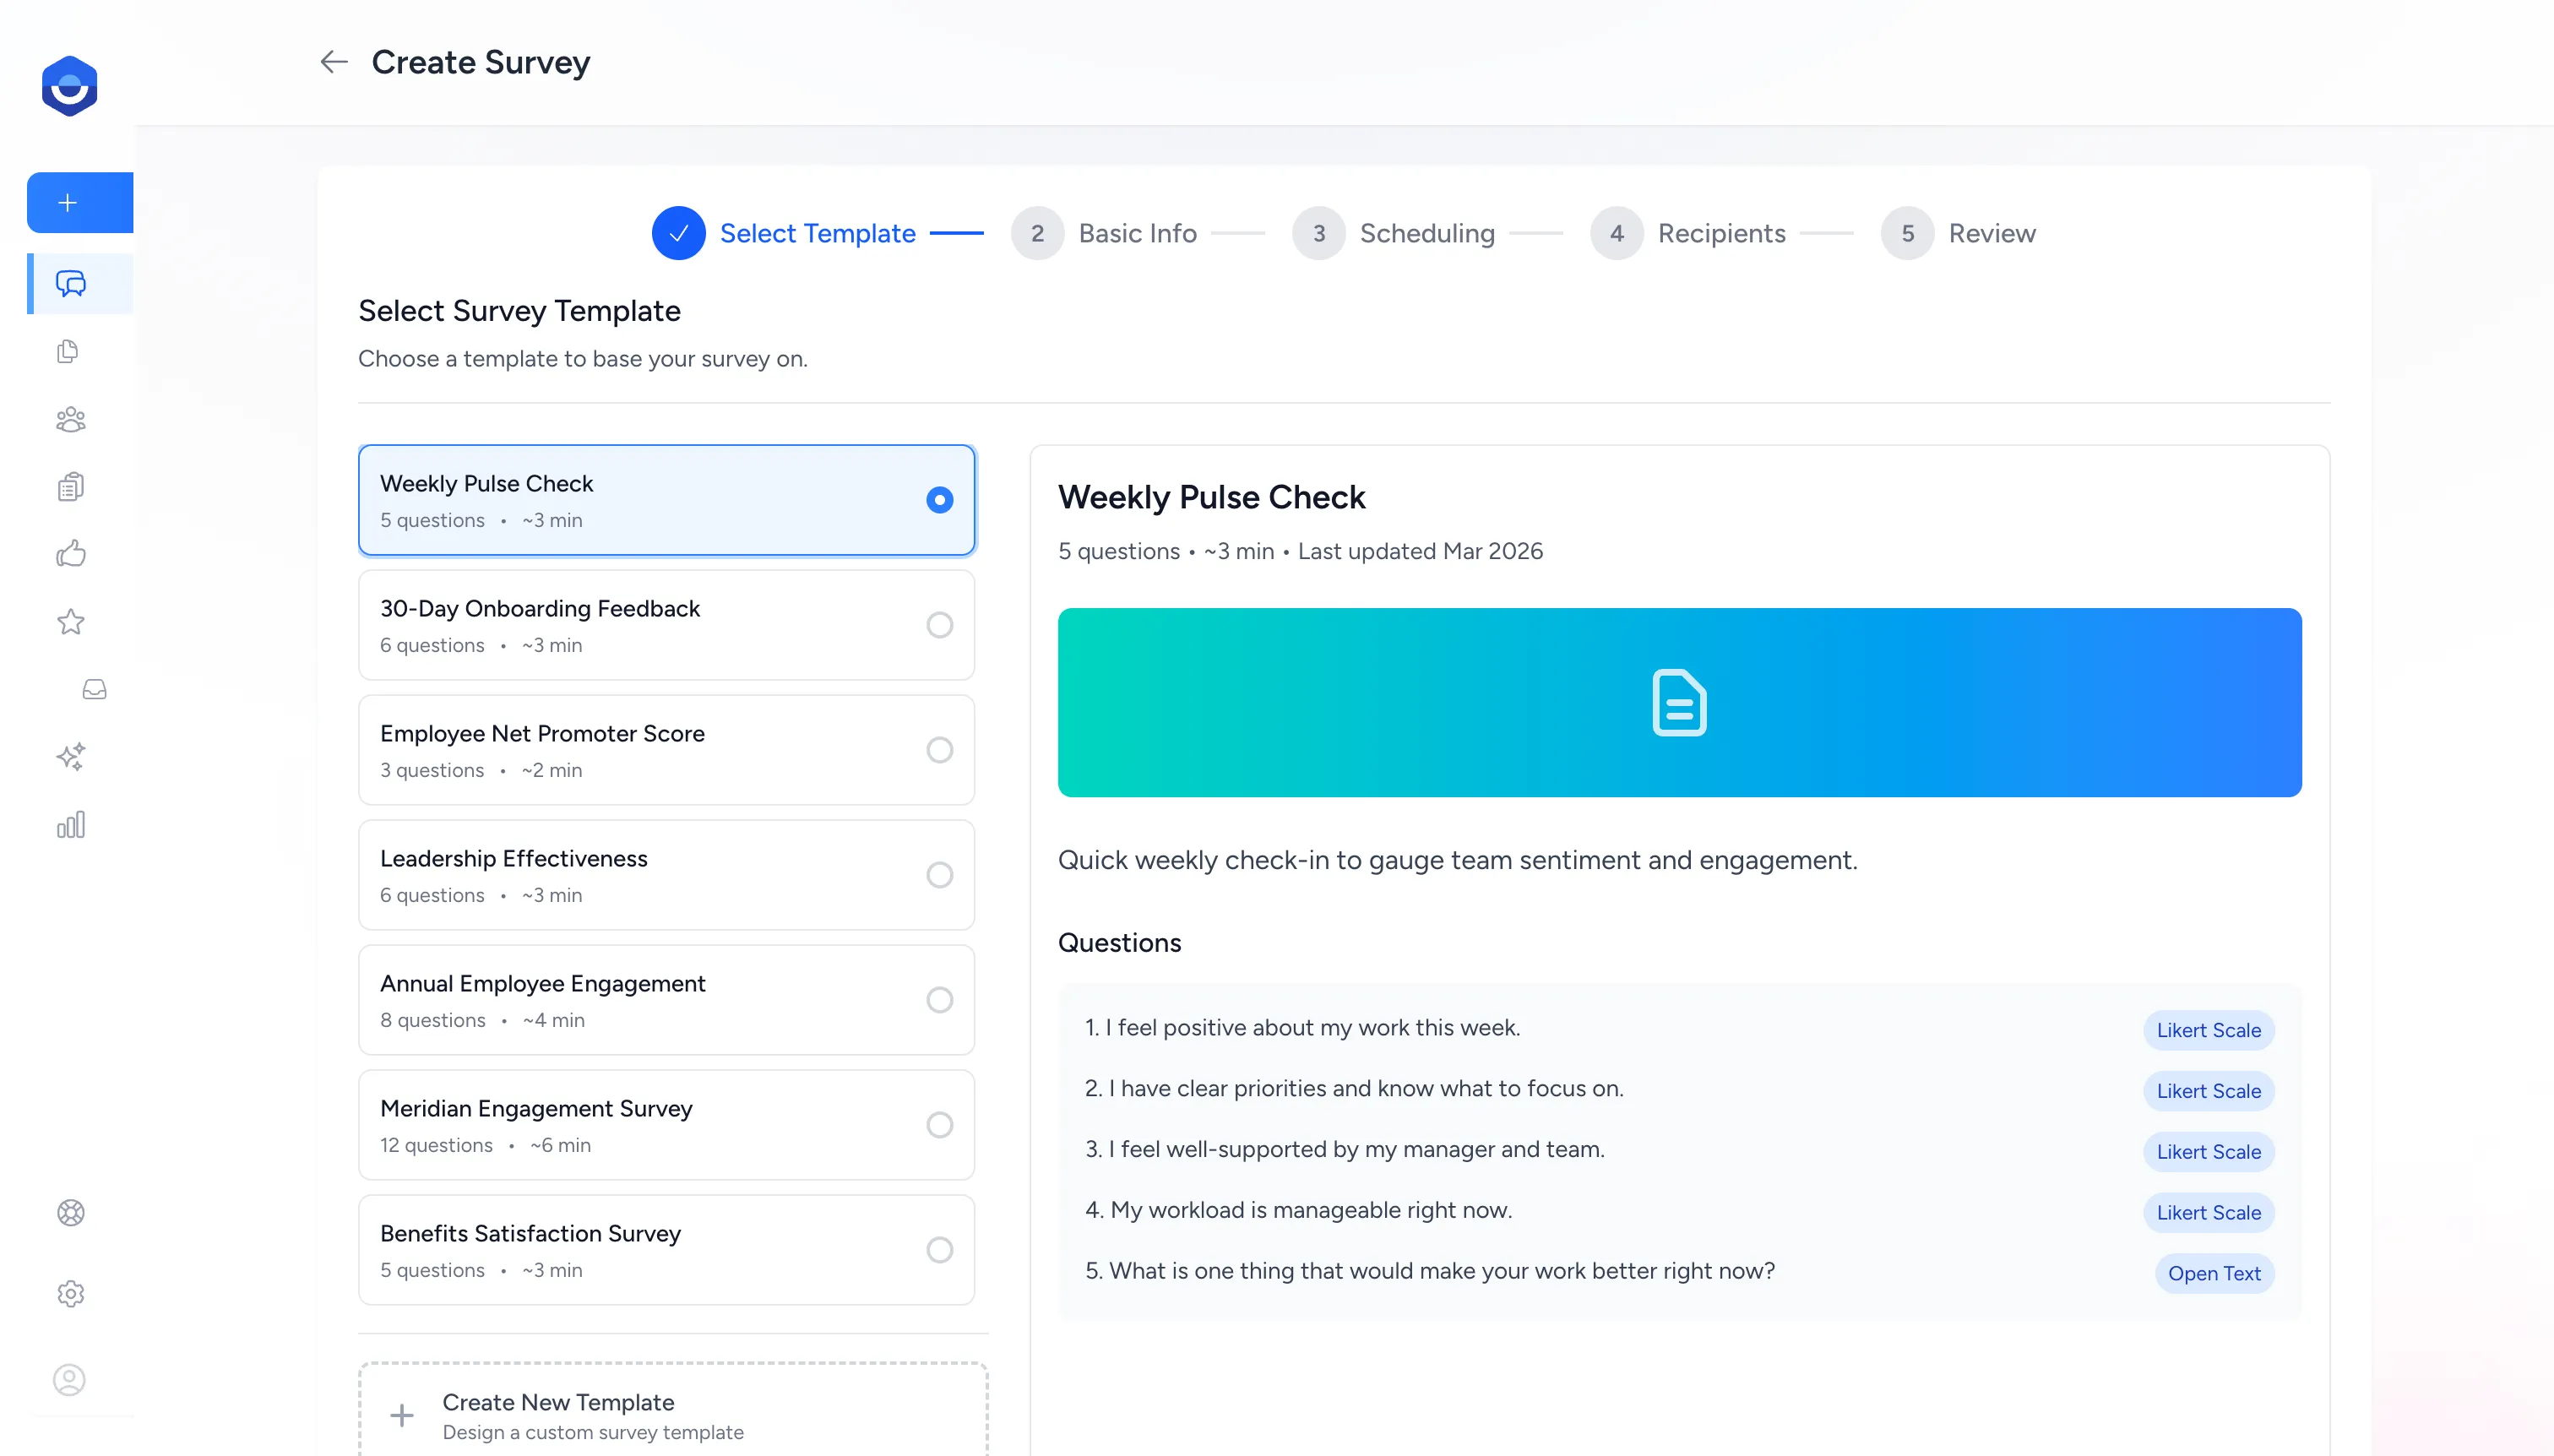
Built-in templates to get you started:
| Template | Questions | Typical use |
|---|---|---|
| Weekly Pulse Check | 5 | Regular team sentiment check-in |
| Employee Net Promoter Score | 3 | Measure employee loyalty |
| Annual Employee Engagement | 8 | Comprehensive yearly measurement |
| 30-Day Onboarding Feedback | 6 | New hire experience after first month |
| Exit Interview | 5 | Departure insights |
| Leadership Effectiveness | 6 | Manager feedback from the team |
Select Create New Template to design a custom survey from scratch.
Step 2: Configure basic info
Section titled “Step 2: Configure basic info”
- Survey Name — required. Appears in the invitation email and on the results page. Pre-filled with the template name — edit it to match the specific survey.
- Description — optional context shown to recipients before they begin.
- Make responses anonymous — on by default. When enabled, individual identities are hidden and only aggregated results are visible.
Step 3: Set the schedule
Section titled “Step 3: Set the schedule”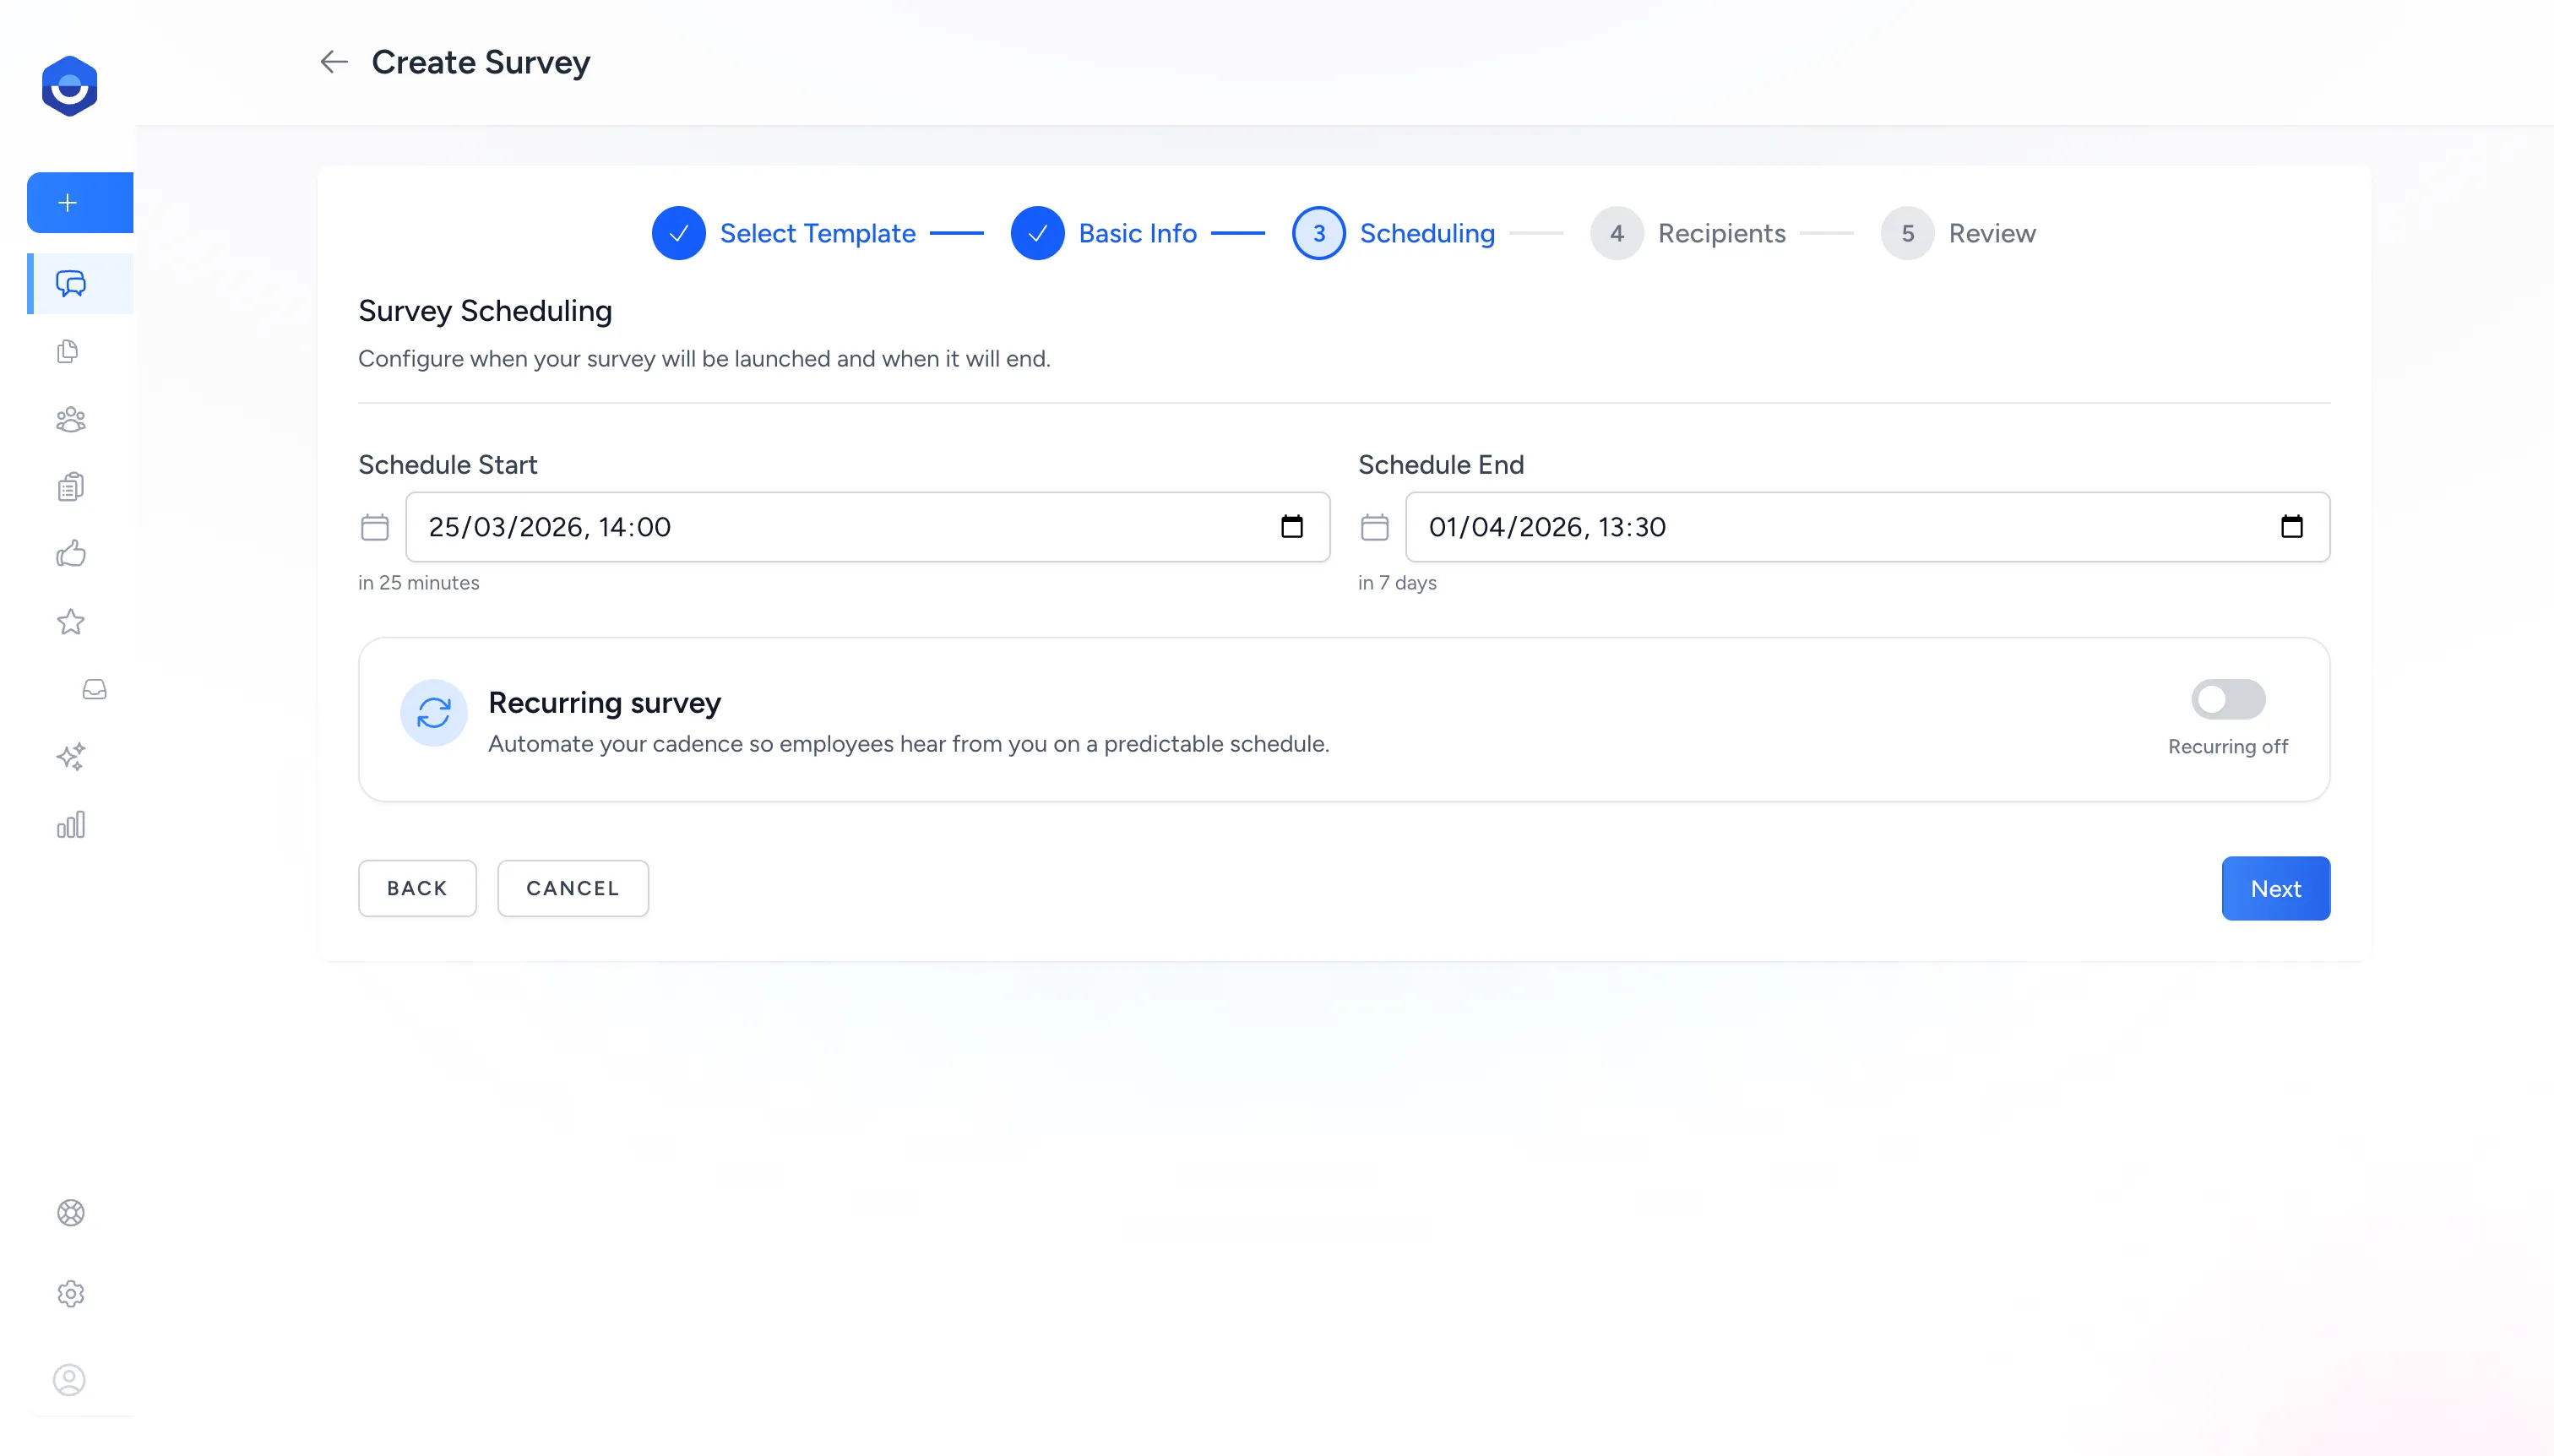
- Schedule Start — when invitations are sent. Defaults to now, so leaving it as-is launches the survey immediately after you confirm.
- Schedule End — when the survey closes and stops accepting responses. Defaults to 7 days after the start.
- Recurring — toggle on to automate repeat delivery on a set cadence (weekly, monthly, etc.).
Step 4: Add recipients
Section titled “Step 4: Add recipients”
Browse and select employees by name, email, or department. Click Select All Visible to include everyone shown, or check individual boxes to build a targeted list.
Recipients receive a direct link by email and can respond without logging in to FeedbackPulse.
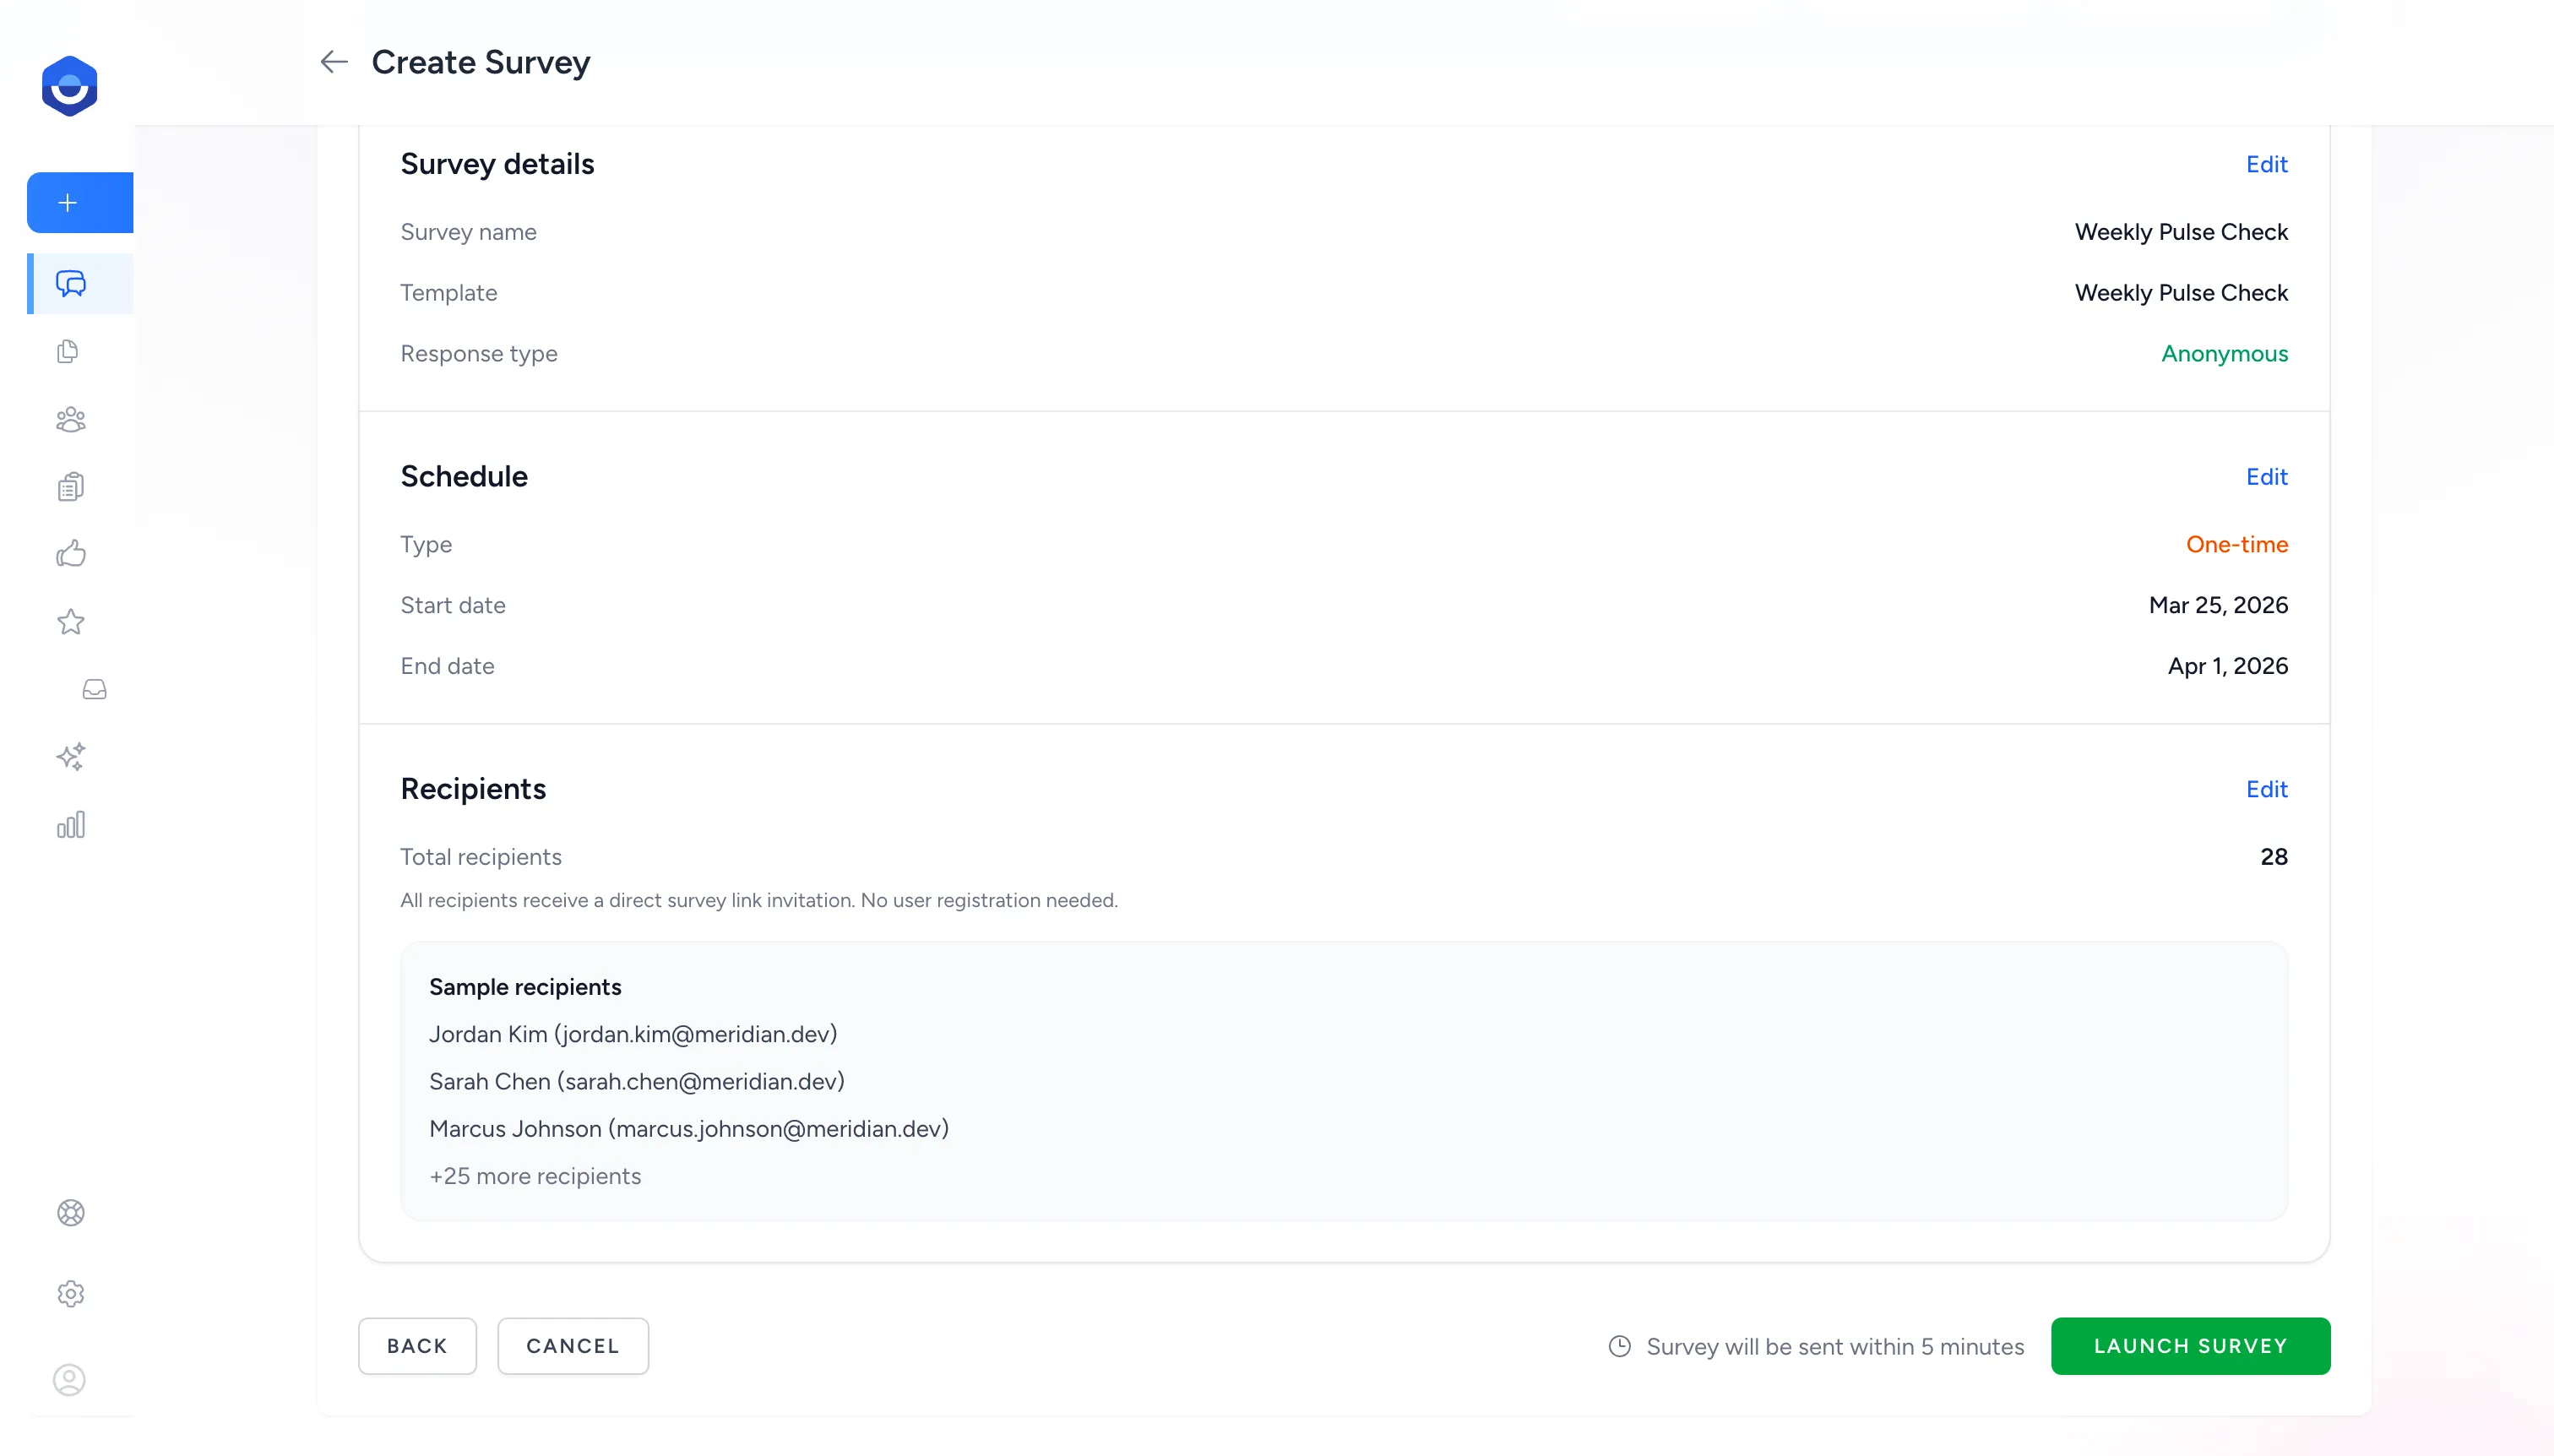
Step 5: Review and launch
Section titled “Step 5: Review and launch”FeedbackPulse shows a summary of your survey before it goes out — template, recipient count, schedule type, and anonymity setting. Review each section and use Edit to go back and adjust anything.
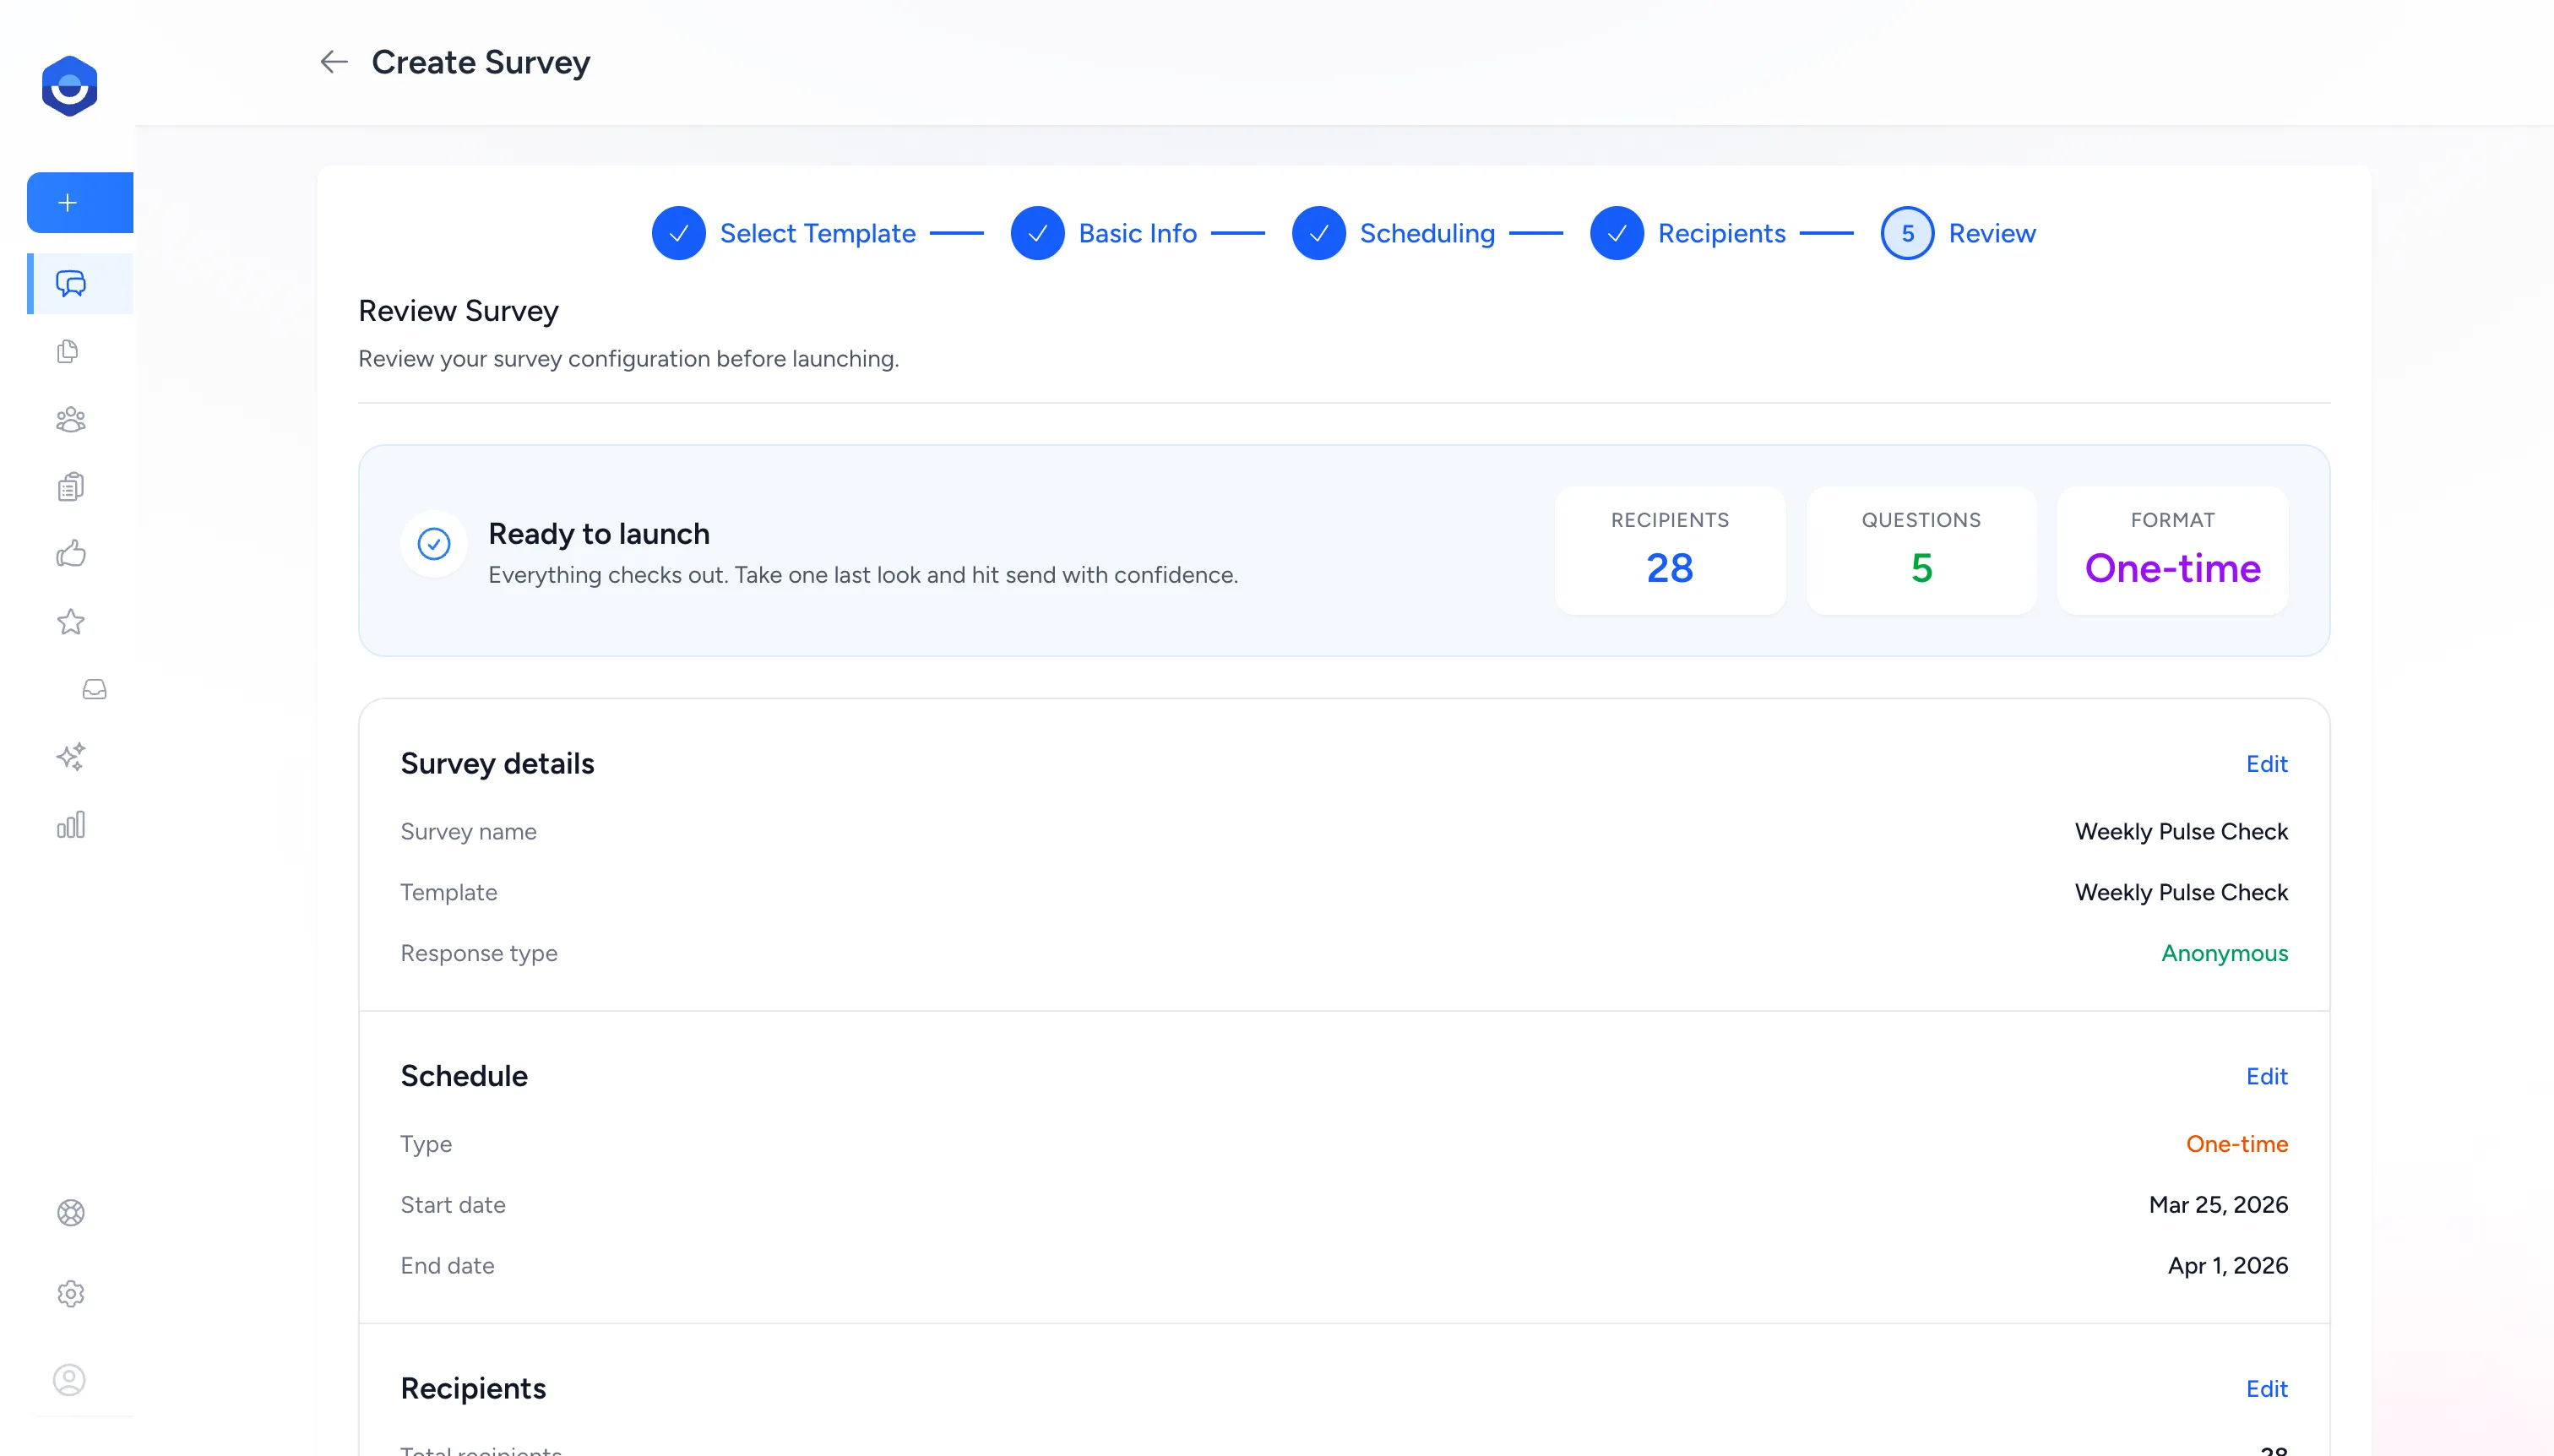
When everything looks correct, click Launch Survey at the bottom of the page to send invitations immediately. If you set a future start date, the button reads Schedule Survey instead.
What happens after launch
Section titled “What happens after launch”Each recipient gets an email with a unique link to their response. The survey status tracks where it is in its lifecycle:
| Status | Meaning |
|---|---|
| Active | Live and accepting responses. Invitations have been sent. |
| Scheduled | Not yet started. Invitations send automatically on the start date. |
| Completed | All recipients have responded. |
| Expired | End date has passed. No more responses accepted. |
Results appear in real time on the survey’s Results page as responses come in.
Rules and constraints
Section titled “Rules and constraints”- Only Admins can create and launch surveys.
- Anonymous surveys require at least 3 recipients.
- Recipients must have a valid email address. Terminated employees are excluded automatically.
- A recipient cannot be added to the same survey more than once.
- Your plan determines the maximum number of active and scheduled surveys that can run at the same time.
Frequently asked questions
Section titled “Frequently asked questions”Q: Can I send a survey to my whole company at once? A: Yes. On the Recipients step, click Select All Visible to add all active employees in one click.
Q: What if I want the survey to repeat automatically — like a monthly pulse? A: Enable Recurring on the Scheduling step. See Pulse Surveys for full recurring cadence options.
Q: Can I see who responded and what they said? A: If the survey is not anonymous, each recipient’s individual responses are visible in the results. For anonymous surveys, only aggregate data is shown — individual responses are hidden to protect respondent privacy.
Q: Can I add more recipients after the survey goes live? A: Yes. Go to the survey page and add recipients from there. New recipients receive an invitation immediately.
Q: What if I need to close the survey early? A: Go to the survey page and close it manually. Existing responses are preserved. Recipients who haven’t responded can no longer submit.